Tuesday, July 31, 2007

How to Test Autofocus


This post ended up so large, I split it between entries. The follow up entry (much delayed) is here.

As I mentioned in my 20D review, I am concerned that the auto-focus in my 20D is out of calibration. So I decided to test it... at least somewhat scientifically. If you are one of those people that likes to read the last page of the book before the first, I'll give you the end before the beginning:

My 20D's autofocus is fine, or at least not worth sending to Canon to 'fix'.

But, you may be asking, how do I figure out if my autofocus is working correctly?


How Autofocus Works:

This discussion only really relates to SLRs, specifically Canon digital SLRs. Most fixed-lens point and shoots use an active autofocus system (for more information, see here).

Canon dSLRs use a passive, TTL (through the lens), optical system. In other words, your autofocus judges focus much like you do: it looks through the lens and determines when the image looks the sharpest. But unlike a person, who will keep rotating the focus wheel until it looks sharp, Canon's system can calculate where focus should be after one reading, then commands the lens to move to a position which should give the correct focus. The gory details are in Gordon McKinney's autofocus post. There's also an interesting discussion about the 30D autofocus in this DPC thread. And here are two more threads with lots of good info.

To compute focus, Canon has placed special sensors on the bottom of the mirror box (using a secondary mirror underneath the half-silvered main mirror). These sensors can measure the focus as long as there are high contrast regions in the image projected onto the sensor. In other words, if you point your camera at a blank wall, the sky, or a polar bear in a blizzard, there will be no contrast and the system will be unable to find focus (instead, it will hunt through the full range of focus hoping to find something it can use). Also, the focus regions are small strips of the viewfinder area, so it is possible to 'miss' the object you are trying to focus on (resulting in a confused camera).

There are three take-home messages about the 20D (and 30D) autofocus:
  • Autofocus is not perfect. In fact, much of the time you'll be lucky to get the object used to focus within the range necessary for a good image. Because Canon cameras measure the 'focus' and then command the lens to move open-loop, it isn't hard to be off in focus, especially since there is some inaccuracy built in. A feedback loop around focus would be great, but for some reason Canon didn't do that (probably too hard given the range of lenses and focusing systems).
  • The 20D and 30D autofocus system isn't really a step up from the 350D. For some reason, autofocus is an area where these cameras seem to have poor quality control. This means you need to be tolerant (almost expect) a bit of autofocus slop in a 20D.
  • There are techniques which can help you compensate for poor focus performance of the 20D.
So, what can you do?

Test your camera, of course! In my opinion, anyone who gets a 20D or 30D should run some simple tests on their camera to verify it doesn't have a (major) focus problem and identify any specific focusing issues.


Testing Procedure:

The testing procedure I used is modeled after Francis Poon's test (and uses his target). Go to his site for the details. An alternate test and target are here and the idea is the same (but the target construction is advanced origami).

The basic procedure is:
  1. Print a test pattern and assembled the 45 degree target. I taped mine to a clipboard.
  2. Set the target on a 45 degree slant which will face the focusing target directly at the camera. I leaned mine on a box and secured it with scotch tape.
  3. Make sure you have plenty of light on the central focusing target. I used a lamp for the full area, then a flashlight on the focusing target. In all honesty, I should have gotten more light on it. See the image that opened this post for the full setup.
  4. Set your autofocus to use your center sensor. You could run the test on the other sensors too, but start with the center one.
  5. Focus, using manual or autofocus depending on the test, and then take a picture. Better yet, take a bunch of pictures, with different lenses, different focusing techniques, and keep track of what you did.
  6. Look at the images on the computer (usually 100% crops) and use the scale to the left and right of the primary focusing target to determine where the depth of field is. The letters ('a') are the best guide to seeing the region of focus. The scale is designed to give millimeter depth measurements if the image is tilted at a 45 degree angle (I didn't do anything special when I printed mine, so it could be a little off).
  7. Compare your measurements to the expected degree of field for your focal length and aperture measurement. I used the DOF calculator here for my computations.
It may seem complicated, but it really isn't. The hardest part is determining what you will test and keeping to the scientific method. Generally, you should try to keep everything as similar as possible between test photos except the variable you are testing. This includes controlling your lighting, camera to target distance, viewing angles, etc.

If the focus is good, you'll get an image like this (click to see the unedited 100% crop of the JPEG):


Note the 'blurriness' of the 'a' line. That was my main guide for finding the degree of field.

If the focus is bad (for reasons listed below) you'll get a crop like this:


The image above shows a front-focus of about 12 mm. Depending on the lens and aperture, that may not even be out of the depth of field.

Seriously, this test isn't that hard. Just takes a little organization and a few hours.


Possible Areas of Failure:

There are a number of areas in a camera which can be miscalibrated. Luckily, pretty much everything can be tested with the target set-up above. Just come up with your own sequence of images and procedure (I'll list mine in my next post). Make sure you check the following:
  1. Viewfinder plane calibration. This isn't often a problem, but you'll want to know if the sensor plane is at a different distance than your viewfinder plane. Just manually focus on the target and shoot a few shots (clearing your focus each time). This ends up being an eyesight test too, but if you take your time and have decent eyes, you'll definitely get within the depth of field.
  2. Test the autofocus calibration. Test your best lens, the longer the focal length the better, since longer focal lengths have a narrower depth of field and the autofocus will be more accurate. Autofocus from both focus extremes (close and far) and see how well it does. If there is a consistent focus offset that is significantly larger than the DOF for that focal length and aperture, you may have a problem. Apparently, this is more common than problem #1, since the floating mirror has some play in it. A little offset, especially on a 20D or 30D (of about 1 DOF) is probably to be expected, any more than that and you probably ought to have Canon calibrate it if it is under warranty.
  3. Test each of your lenses. Since the camera works with the lens, there can be significant variation between lenses. If one lens is much worse than the others, it needs to be calibrated.
  4. Test each focus sensor. I drew horizontal and vertical lines of different thicknesses, and tested to see how well the different focus sensors picked them up. If one of your sensors is faulty, this is the way to find the problem.
  5. Test for viewfinder screen offset. While the plane of the viewfinder screen is usually well constrained, there is a decent amount of play in the horizontal direction for the sensor boxes. So see if you can focus with the sensor indicator slightly above or below a feature -- with some experimentation, you can determine how your viewfinder indicators are offset from the actual sensors. Unless it is a huge amount, just keep that in mind when you are using your camera. Also, keep in mind that each sensor is usually three times the length as the indicator, but relatively narrow in the other direction.

That covers it, stay tuned for my next post about my results.

Sunday, July 29, 2007

Excuses, Excuses...

This is going to be one of those posts where I just make excuses about the lack of updates on my blog. But, the genius is I can hammer out a quick post and feel all... productive.

Anyway, if you care more about photography than my life, you may want to skip this one. There's nothing photography related in this post.

So, with that out of the way, I want to give my readers (Hi Mom! Just kidding, even my mom doesn't read this blog) a heads-up that I'll be dropping down to about a post or two a week for a few months. The reason is best explained with a list of my activities lately:
  • Found and signed a contract on a rental house. That may not seem like a big deal, but when you need to deal with commutes, school districts, open houses, craigslists ads, ten families showing up to each open house ("Bid up" the agent says), and finally the fact that on paper (and in real life) most rental houses have a monthly rent of 90% of our pre-tax income, it is a time consuming task. But, all that is simplified now that we've signed a contract for a house that ONLY costs $2,495 a month. And doesn't have a refrigerator. Which brings me to...
  • ... we need to move our family of four (and about twice as much stuff as most families have) in two weeks. Assuming we can even move in on August 1st, which is not guaranteed.
  • Right after we move, I present at a conference in Korea (South Korea of course, hold your jokes, please), my wife starts her full-time school program, my son starts at a new school, and my daughter learns to babysit herself starts at a preschool. Which brings me to...
  • We need to find my daughter a preschool.
  • This whole time, I've been putting in about thirty billable hours a week for my SAT prep job. Which is the equivalent of forty hours a week when you consider travel and prep time. Luckily that will drop off a bit after this week, which is good, because we'll be moving. Either way though, I've been spending a lot of time on the road, which brings me to...
  • ... we just bought a new (used) car. After realizing that my wife would need to be able to drive to school each day and it isn't going to be practical to swap the minivan back and forth (plus its gas mileage is less than ideal) we started a quick search for a second car, mostly for commuting. We ended up getting a '98 Honda Civic EX for $4,000 pictured at right from Harry at Auto Best Buy (click picture to see the details). As far as used car dealers go, Harry is as honest as they come and he has a good selection of lower-priced Japanese cars. We still spent about four hours in his lot...
  • ... and now I have a sun burn. Ok, I guess I'm whining at this point. I'll cut myself off.
My point is, I've been busy and will be busy until I get back from Korea. Actually, I'll probably remain busy after my trip since fall is prime SAT season and I'm considering submitting a paper for a September deadline.

On the positive side, I'm aiming to bang out the autofocus post tonight, so hopefully that will get posted early this week.

Monday, July 23, 2007

A Chicken Vulture!


I noticed The Dish was open again on Saturday and we decided to take a walk around yesterday to see what devastation the fires caused. The good news is that the fires didn't spread too far, the bad news is that the area will bear a dark scar for a while. I think I'll use my observations and photos from that walk for my second entry in my article series, so stay tuned.


Now, about that photo above. There's a funny story about that...
My family (my wife, son, and daughter) were walking on the path when my wife pointed at a big brown bird and the following conversation occurred:

Her: "Hey look." [quietly, while jabbing my shoulder] "A chicken... No, a rooster."

Me: "A turkey!" [pause] "A turkey vulture!"

[much laughing]

Me: "A chicken vulture!"

[more laughing, maybe we were just lightheaded from the walk]

During this conversation, I happened to have my 70-200mm reading and on the camera, so I managed to fire off a few shots before the chicken turkey vulture flew away. Sadly, I missed the focus on a few of them (I swear there is something up with this 20D) but a few came out ok.

The lighting and my angle wasn't ideal. The conversation (and the timing of the conversation) was hilarious.

Oh, and this is what it looks like when a turkey vulture flies away.


For as big (and fat) as it looked on the ground, it was very graceful in the air. I can only assume it was in the area looking for toasted animals from the fire.

Saturday, July 21, 2007

Review: Canon 20D

So I finally got around to this review. It has been a long time coming, and I apologize in advance if you expected more. If you need nitty-gritty specifications, there are already a ton of nice reviews out there (some of them are listed on my camera body comparison page). These are mostly my personal impressions of the camera after upgrading from a 350D (Digital Rebel XT).

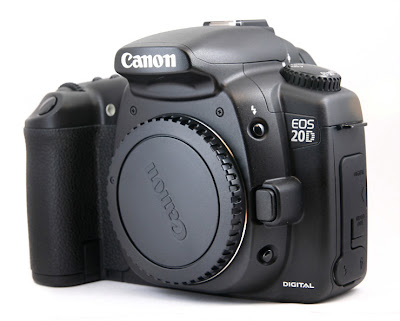
As you probably know, I bought a refurbished 20D from eBay for $640 and added a $55 SquareTrade warranty to it. I'll provide a color-coded list with illustrations (green means something good about the 20D, red means something bad):
  • User Interface. I can't tell you how much it helps to have the thumbwheel on the back of the 20D. It makes everything more efficient, from manual mode to setting ISO. The best part is menu navigation: now I can zoom through the menu with a flick of my thumb. Even the little buttons seem to have a better feel. When I picked up the 350D recently the buttons seemed really cheap.
  • Improved Shutter. The faster (and supposedly more reliable) shutter is a big reason to upgrade, and I noticed it immediately. Not only is there less black-out time, but there is less shutter lag. My first few shots I had a distinct feeling of "Whoa, it's already done?". The improved shutter also allows a 1/8000 sec shutter speed and a 1/250 sec sync speed, relatively minor increases, but they'll help in extreme situations. The side effect is a very loud (but reassuring) sound.
  • Improved Viewfinder. This is another must have aspect of the 20D. The 20D viewfinder is definitely larger and brighter than the 350D. It also seems to be less finicky about viewing angle (if my eye isn't perfectly centered on the 350D I start seeing shadows creep in). Since I spend so much time looking through the thing, I'm very excited that I'll have a clearer, larger view. The improved focusing screen actually seems to make a difference too.
  • Glitchy Autofocus. The jury is still out on this, but I think the autofocus on my 20D is pretty crappy. It seems like I have more trouble getting it to focus, which is surprising since that it one of the big advantages of the 20D over the 350D. Currently, I'd say the 350D does a better job of focusing than my 20D. Specifically, thin objects have given me a ton of trouble with hunting and just generally missing focus, even when the focus area is right on it. I'm planning on giving the focus system a thorough test in the near future and reporting the results here (and sending the camera to Canon for repairs if necessary). From what I have read, it is very common for 20Ds to have autofocus problems.
  • Size and Handling. Although the 20D is larger and heavier, it is much more comfortable in my hand. I picked up the 350D the other day to take the pictures that accompany this review and got an instant hand cramp. While the 20D seemed tiny in it's box, it felt like a monster when I picked it up since I was used to the 350D. Either way, I really enjoy the way it feels in my hands (FYI, I'm 5'9", 175 lbs with average build).
  • Sensor. The sensor is, in my estimation, no better (or worse) than the 350D. Not that I expected anything, but when you pay this much more for a camera, you hope for a slight improvement. Overall, I've gotten good images with it, although I feel like long exposures (>10 seconds) are worse than the 20D.
  • Incompatibility with 350D accessories. While I understand the motivation, it annoys me that I have to buy new batteries and a new remote release for the 20D. At least it has a PC jack though. But I still miss the 3.5mm shutter release jack that let me make my own remote releases.
  • 5 FPS. A big selling point of the 20D is the increased continuous shooting speed of 5 FPS instead of 3 FPS. And boy do you notice. The downside is you'll fill your buffer in a little over a second if you shoot RAW (something that is alleviated in the 30D). And I wouldn't mind a 3 FPS option, but I really do like this feature. It makes you feel so powerful to shoot a fast string of photos (even if they are all almost identical). Once I get a chance to shoot some sports, I'll be able to give a better report.
  • Durability. While the magnesium panels probably don't improve the strength of the camera as much as they claim, the 20D definitely feels like a more solid camera. In particular, the CF door on the 350D always felt cheap and moved around a little bit underneath my palm. The 20D has none of that.
  • Status LCD on the top instead of the back. I had no idea how much this would bug me, but I find the top LCD very annoying. After all, I'm usually looking at the back of the camera anyway (to look through the viewfinder) and so I really have to move away from the viewfinder and shift my head to set the ISO, auto focus, etc. Even worse, if I have it on a tall tripod, I can't see the status at all. Very annoying.
  • On/Off button location. This is a minor gripe, but I really liked the location of the XT power switch. Since it was right under my right thumb, I could pop it on and get it into place in a split second. The 20D location is a lot less convenient, but with auto-shutoff, I guess I shouldn't stress too much.
So, overall, I'm very happy with the purchase. Other than a few minor UI annoyances, the only major drawback of the 20D is the autofocus, which I really need to evaluate.

And, just to prove it is really a refurb, here's the box.

Thursday, July 19, 2007

Phew!

We've got a place to live and have signed the lease. We'll move in around August 1st.

Sorry, no pictures with this quick post.

And I haven't picked up a camera (other than taking some 20D pics) in over a week. Hopefully I can finally carve out some time to take some pictures. Walking around with the camera is such a great stress reliever and I really miss it.

Monday, July 16, 2007

I Hate Rebates!


I finally got around to getting some pictures of my 20D tonight. Hopefully I'll get around to the review later this week, but don't hold your breath, because our apartment search is going full speed. Soon though.

While I was at it, I figured I'd get out the rebate paperwork for the Kingston CF cards. And I realized the rebates needed to be postmarked by 14 days after the purchase date. Crap!

That is why I hate rebates (other than the instant kind). There are so many ways to screw it up, and then even if you send it in correctly, you may never see any money. That has happened to me more than once. If only I had opened all the materials when I received the cards, I would have avoided a $30 loss. At least the cards work well.

Saturday, July 14, 2007

SquareTrade Warranty... DONE.


Long time no posts (for me at least). The image at the top of this post is an outtake from the Dreams challenge at DPC. The fly pretty much killed what could have been a pretty good picture (kind of sums up my week).

There was a bunch of stuff going on this week, including:
  • The DPL playoffs. I tanked and had some bad entries, but the rest of my team turned in our best week yet. We're still not convinced we'll beat the Ribbon Hogs though.
  • Major time on the part-time job. Suddenly, I've gone from 2 hours of tutoring a week to almost thirty hours a week (including tutoring, teaching, and proctoring). That, along with my PhD research (and my third job, which I've knocked down to a few hours a week) has me spread pretty thin.
  • Apartment hunting. It looks like we'll actually be kicked off campus this summer (it has been threatened the past few years but this time it looks like it will likely happen). Nothing bad, I'm just out of priority years (a ten year PhD will do that to you). What's worse is the rent at the cheap places is still well more than 50% of our income (even with our five jobs). But we have a plan.
  • Family shoots and editing. Last weekend I had two shoots, and I also had two families leaving the area this week so I had to rush to get most of their shots edited.

Sadly, it doesn't look like the rest of the summer will be much better, but the stress level will go down a lot once we know where we will live.

In other news:
  • The 20D is working out nicely. Look for my initial review in the next week or so (I just need to get some time). Review summary: I really like it, although it has a few things that bug me.
  • I got the Kingston 2GB Cards and extra battery. So I'm pretty set up with the 20D now. I still need to submit the Kingston rebate though!
  • I've been rethinking the decision to start a photography business. I can put in a lot more hours (with less overhead) doing SAT tutoring, and with the move off-campus, it might be more work that I'd like. Expect a post on this soon. I'm not planning to abandon the idea, just scale it down a ton and do it more for fun.
  • We have an ant colony in our minivan. Never thought it could happen, but it did. Two weeks ago we found a bunch of ants in the van, cleaned it out, and I assumed that they'd just found their way to the food droppings my kids had left everywhere. We didn't see too many after that, but this week I left a wrapper on the passenger seat and two hours later ten ants were on it. Ant traps were put in the van that night, and I haven't seen any ants in the van since.
  • I've finally decided on the SquareTrade warranty...

Yup, it took me a while, but I decided to get the SquareTrade warranty for my refurbished 20D right before the offer expired tomorrow. It was a pretty close decision, honestly, and I only really decided about an hour ago. Yesterday, I was planning on not doing it :) But, today I went ahead and spent the $55 (I had a 10% off code).

This is my reasoning:
  • Mathematically, it is about the same either way. Obviously, SquareTrade can't make money off the warranties if, on average, people need a replacement item over 10% of the time. Ignoring cases where the user breaks the camera, I'd say most electronics items will break less than 10% of the time if you exclude the first 60 days of use. But, I have to figure a digital camera (especially an SLR with a fast moving mirror and shutter, plus many buttons) will tend to break more often. Plus, I'll be using the camera more than the average consumer, so that pushes it in my direction too. Overall, I thought it'd be about the same: either I insure it myself and save a small amount of money now (but risk more later if it breaks) or I do the SquareTrade warranty and pay a little now to avoid more later.
  • I trust SquareTrade. It is obvious they care about their PR, so they aren't going to risk screwing over consumers on technicalities.
  • The 20D is refurbished. Realistically, I don't know what has been done to the camera in the past, or how much use it has gotten. If it was a new camera, the Canon warranty would probably be enough for me. But since it is a refurb, I like that extra security.
  • They have a refund policy. My biggest concern is the decent risk that I (or someone I know) will accidentally break the camera. In that case, the money I put towards the warranty would be lost... except they offer a refund: "REFUND POLICY: We will provide you with a full refund if you cancel your Service Agreement within 60 days of the purchase of your item. If you choose to cancel your Service Agreement after the first 60 days, we will pro-rate your refund based on how much time has passed. You can also transfer your Service Agreement at no cost." (from their website) So the only time I lose money is if my refurbished 20D stands up to heavy use over the next two years. Which isn't really a loss in my book.
  • I had the 10% off offer. Silly, but that extra $6 off pushed me towards the purchase and made the math work.
So, in summary, I spent about $700 total on a refurbished Canon 20D which will be under warranty for a little over 2 years. The first 90 days will be the Canon warranty, and after that, it will be SquareTrade. I absolutely trust SquareTrade because they have learned the hard way that customer service is what defines a warranty company. And hey, if I break it, I can always get the remaining money back.

Oh, and of course, if something breaks and I end up contacting SquareTrade, you can bet I'll post here about it. Likewise, if you have an interesting SquareTrade experience, post a comment!

Tuesday, July 10, 2007

Quick Tip #9: Turn off 'Shoot w/o card'

Note there are no images with this entry. There is a reason for that.

Before I go into why, do me one favor. Go to your camera (if you have a Canon) and turn off the menu option called Shoot w/o card. There may be something similar on Nikon.

Just do it, don't ask why...

Ok, so you want to know why anyway, right? Well, that option lets the camera operate normally even if it doesn't have a compact flash card. Instead, it takes the photos and dumps the data silently. At first, I thought that was a great idea, since it let me try out the camera without writing any files.

Until I tried to take some pictures today of my children with a few other neighborhood kids. And only realized after I was done that the twenty some shots I took were gone. Hence, the no pictures on this post.

So just turn it off. Today, the pictures weren't irreplaceable. But if it was for a paying client, it could have been disastrous. So just turn it off and let the camera get angry at you if you don't have a CF card in. It is much better than losing moments forever.

Sunday, July 8, 2007

Quick Tip #8: Check Your Background!

Last night I completed another TFCD shoot, and it went very well (the family dressed in traditional indian cloths, very beautiful and interesting). Except the first series of shots.

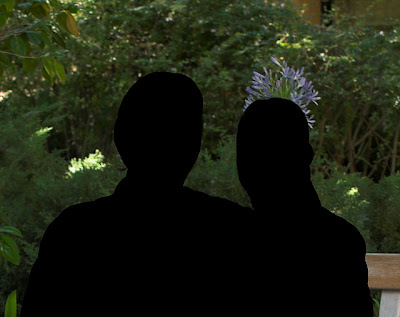
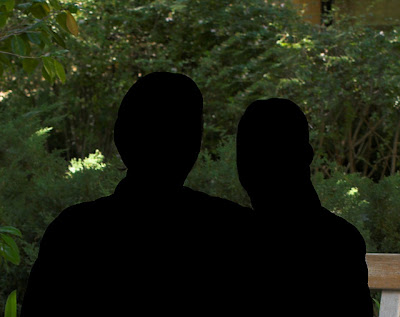
I've gotten a routine down for the TFCD shoots where I arrive at a location early to set up the lights and get everything dialed in on the camera. Actually, for the last two shoots (and tonight's) I've been using the same garden (as seen at the top of this post). It works great, except last night I made a rookie mistake: when I was shooting, I didn't check the background:


Can you see the problem?

For the record, my friends were concerned about their images showing up on the internet so they wanted approval before I posted anything. For the purposes of this post, I removed them since it is the background I wanted to show.

The good news is that the flower can be easily removed by cloning, especially with an out of focus folliage background.


I also have a shot or two with no people in it, so I could easily clone the flower in to the right or left in an appropriate place. So nothing is really lost from the client's perspective, since the images I will show them will be fixed. But from my point of view, I cost myself an hour or so of cloning and editing proofs to remove the flower 'tiara' from her head in about ten images. And all of it could have been avoided, if I'd just looked through the viewfinder and took into consideration the background.

The moral:

Check the background before beginning a series of shots.

From now on, I need to get in the habit of checking the whole picture (not just the smiles and exposure) before shooting. It will save me time (and money) in post processing.


Bonus Tip:

In this same series, I tried to keep the ISO at 200 for less image noise, so a reasonable aperture (f/7.1) gave me a shutter speed of 1/40 sec. I thought the tripod would prevent camera shake and stop motion, but I didn't consider the motion of my subjects. Well, I balanced the ambient correctly, but many of the images have significant blur from subject movement. Moral:

It is better to use a higher ISO and deal with noise than to risk image blur at a long shutter speed.

Thursday, July 5, 2007

Fireworks

Here's my required fireworks picture in honor of the holiday. Taken with my 350D since I hadn't gotten the 20D out yet. Happy July 4th!


Oh, a post without a list? Can't do that.

How about a list of things I learned my first time photographing fireworks (I still have a lot to learn):
  1. Use low ISO (I used 100), a tripod, remote release and bulb mode. I tried timing the shots at 20 seconds (and covering the lens when I didn't want anything else), but it was easier to use the bulb mode and a remote release. Bulb mode allowed me to time the shot to the explosions and control how much of the background showed (use a longer exposure to get more background).
  2. Choose a suitable background. That was my biggest problem, since I was with my family, I couldn't get the Hoover Tower behind the fireworks. Fireworks without context just aren't as interesting.
  3. More is not better. If you get too many shells in the image, it looks like a mess (see right). I found it better to try to only get one or two explosions in each one, or even part of the explosion. Sometimes it looks better if you trigger the shutter just after the initial explosion so the light pattern is empty at the center.
  4. Shoot lots of photos. After all, you don't know what they'll shoot up and when.

Some Fireworks Shooting Resources:

Wednesday, July 4, 2007

Squint-Reduction: Cross-light with the Sun

It is funny how Strobist seems to always know just what I am thinking about. It's also funny how I can reuse photos from the last post to fill this post (just watch!).

Anyway, the most recent Strobist post discusses simple cross-lighting with the sun. While I read and understood the original cross-lighting articles (here, here, and here) it only really hit home on Saturday's TFCD shoot that I can't force my subjects, especially children, to face the sun. Otherwise I get the dreaded squint effect at left.

I always just figured my own kids were too sensitive to the sun and tried to position subjects with their faces toward the sun anyway because it is the most direct lighting. My son, in particular, can't take any sun in his face and we have a ton of pictures in our archives where he has his head tipped down, looking up at the camera through watery eyes.

Of course, maybe it is my own high resistance to sun; I haven't had a pair of sunglasses for over 7 years. I just kept sitting on them and breaking them, so I gave up and let my bushy eyebrows shade my pupils. Side note: how come every year my eyebrows are larger but the hair on my head is disappearing?

When I was setting up on Saturday before the shoot, I naturally chose a lighting scheme where I used my single strobe to cross-light with the sun. My goal, of course, was to keep the sun out of their eyes (and choose an angle where the speckled light wouldn't make patterns on anyone's face). And once I placed the sun at camera left, I needed to put the flash at camera right to balance. Only after the shoot did I realize I had cross-lighted.

Of all the shots, these are my technical favorites. Like Strobist says, cross-lighting with the sun is a dirt simple trick in your repertoire which is a good fall-back if nothing else is working. The best part is, you only need a single flash!

Monday, July 2, 2007

10 Lessons From A Family Photoshoot


For the next week I'm going to be really busy (three TFCD shoots in 8 days, plus my tutoring and classes have suddenly picked up). That, along with the DPL playoffs this week and leading two tours at work, has pretty much sucked away my desire to blog. But at least I'm not as far behind as Photomedic!

Last night I photographed a family that is leaving for bigger and better things next week (the children are J. and L. as seen here). They are good friends and we'll miss them.

The shoot went smoother than my first family shoot around campus, but there were still a rough areas and I learned a few more things. As usual, I'll present them in list form:

1. Acting like an idiot helps get attention of little ones. L., the baby, didn't like to look at the camera. But I found that yelling 'Beep!' at the top of my lungs, waving my arms around, and standing on one leg got his attention. Yes, for some of the shots, I was literally standing on one leg (with my other one out horizontal), and my non-camera hand straight in the air.

2. Golden raisins calm a baby. Near the end, L. was getting fussy (even when I did my little act) but J. (mom) was doing a good job of keeping him calm. Only near the end did I notice her secret; she was popping golden raisins in his mouth whenever he got fussy. Worked great for the shoot (they kept his mouth busy so he didn't cry) but I have to wonder if he has a raisin addiction now. Check it out, you can see it in the image at right (ewww, gross!). Click to see it larger, if you dare...

3. Doing the first set-up before the family arrives helps. For the first spot (the photo that opened the entry) I was able to unpack and balance the flash before they arrived. It allowed them to sit right down and get some shots before the kids even realized what was happening, and since I had time to think through the lighting and setup, I think those were some of the better images.

4. I need to get some experience with a model. This isn't really related to the family at all, but at one point I was working with just J. (the mom) and L. while R. and little J. scouted another location. It was amazing how much easier it was to work with just one person. I really need to find a TFCD model to get some extra practice with posing, lighting, and balancing flash and ambient. Without the need to stand on one leg while I do it.

5. Look around for interesting light. R. actually pointed a few areas with interesting light that I didn't notice; one of them is in the image at right. The sun was coming in low and hitting the stone floor, causing some interesting reflections. In hindsight, I should have bounced the flash off the ceiling and wall behind the camera (and to the left) but it makes an interesting image with nice segmentation between the subjects and the background. Of course, Stanford is just loaded with these types of places, but they can be found everywhere, from the city to the barnyard.

6. More locations may not be better. We did a LOT of locations (maybe 8?). I think I would have been better served to perfect a few instead of moving around so much.

7. Tell portrait subjects not to wear white! I keep forgetting to warn my TFCD families not to wear white, and invariably one (or more of them) shows up wearing stark white. In processing, white is a nightmare to keep from blowing out (and dodging it is not easy). Plus, bright objects draw the eyes, so it is ideal if the subject's faces are the brightest thing in the portrait.

8. Direct sunlight is hard on kids, even in the evening. As much as I'd like to do frontlighting, both little J. and L. had trouble looking anywhere near the sun, even at sunset. Especially J., he was making all sorts of faces when I had him face towards the sun. See left for an example. I need to figure out poses which shield their eyes yet don't make sharp, nasty shadows.

9. An hour is about the max. We went a little over an hour, and honestly both the kids and the adults (including me) were showing the strain. I think 45 minutes to an hour is about the perfect length for a shoot.

10. I need to get a sand bag (or make one) for my umbrella stand. The wind blows it over way too easily (although I was able to tie it down with the ball-bungees... those things are useful!).